Webhooks
Webhooks play a crucial role in automating workflows and enabling seamless communication between systems. Within WordPress, webhooks allow you to trigger events and share information with external services whenever specific actions occur.
This guide will help you understand webhooks, their importance, and how to configure them in forms.
Why Use Webhooks?
-
Automation of Processes: Webhooks enable automated workflows by notifying other systems when events happen.
-
Real-Time Communication: Unlike traditional APIs that require periodic polling for updates, webhooks provide instant notifications. This saves resources and ensures faster synchronization between platforms.
-
Enhanced Integration: Webhooks make it easy to integrate with third-party services like email marketing platforms, payment gateways, analytics tools, and more.
Configuring Webhooks
To set up webhooks for form submissions, follow these steps:
-
Navigate to Dataverse Admin Area → Webhooks tab.
-
Click Add new.
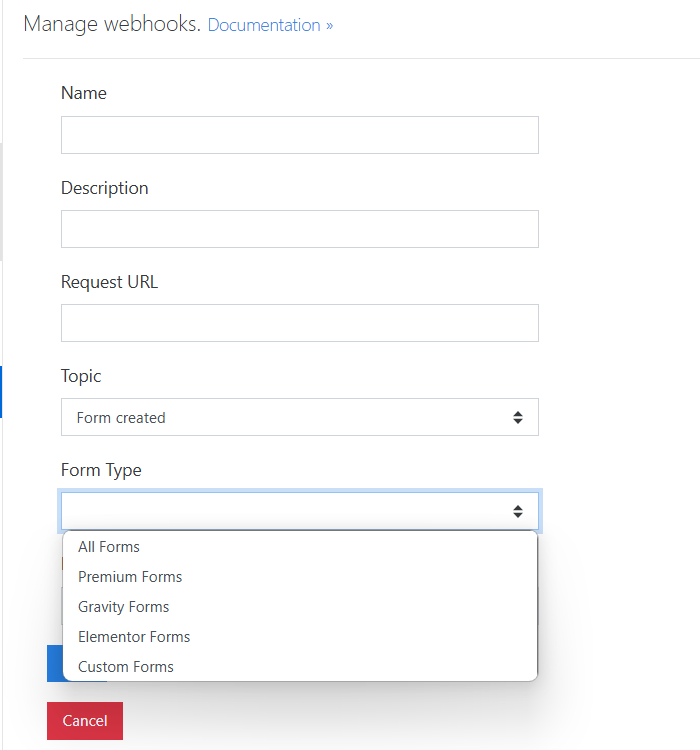
Follow these steps:
- Enter a webhook name.
- Add a description
- Provide the target URL (where the webhook will send data).
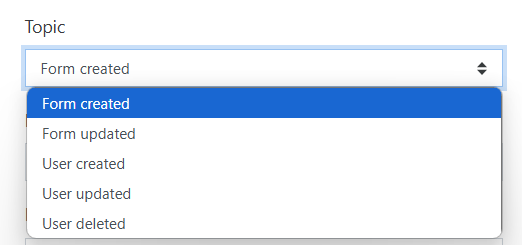
- Choose an action: form/created, form/updated, user/created, user/updated, user/deleted.
- For form-related actions, select the form type:
- Gravity Forms
- Elementor
- Premium Forms
- Custom Forms
- Choose the specific form name from the dropdown menu.
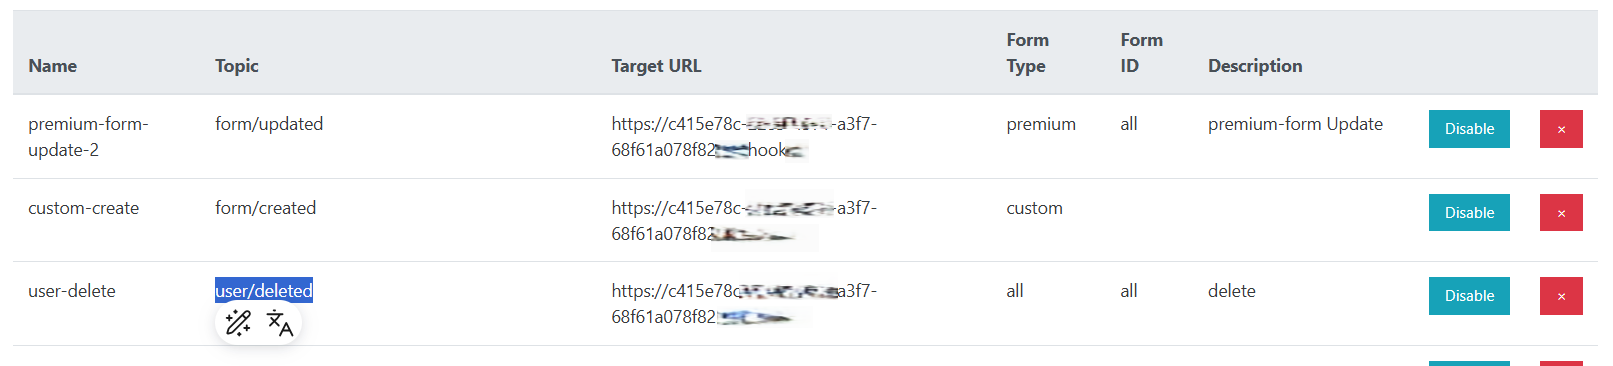
Once configured, you can manage webhooks, including options to update, remove or disable them.
File Upload Considerations:
-
If a form includes a file upload, the page settings define the file size limit in kilobytes (KB).
-
If the file size exceeds the limit, the webhook sends a link to the file instead of embedding it.
-
If the file is within the allowed size, it is base64-encoded and included in the request body.
-
Limits are approximate—ensure that your system supports necessary encoding
API Parameters for Webhooks
Creating a Webhook (Example for Gravity Forms)
Request Type: POST
Endpoint: /wp-json/integration-cds/v1/webhooks
Parameters:
form_id: Specify the form ID or use 'all' to target all forms.
topic: Choose the event type: "form/created", "form/updated".
form_type: Define the form type: 'gravity', 'premium', 'elementor', 'custom', 'all'.
Request Body Example:
{
  "name": "Name",
  "description": "Description",
  "topic": "form/created",
  "target": "http://localhost",
  "form_type": "gravity",
  "form_id": "235"
}
Upon successful creation, the response includes a webhookId, which can be used for updates or deletion.
Updating a Webhook (Example for Gravity Forms)
Request Type: PATCH
Endpoint: /wp-json/integration-cds/v1/webhooks/{webhookId}
Parameters:
form_id: Specify the form ID or use 'all' to target all forms.
topic: Choose the event type: "form/created", "form/updated".
form_type: Define the form type: 'gravity', 'premium', 'elementor', 'custom', 'all'.
Request Body Example:
{
  "name": "Updated Webhook",
  "description": "Triggers on form update",
  "topic": "form/updated",
  "target": "http://localhost",
  "form_type": "gravity",
  "form_id": "235"
}
Deleting a Webhook
Request Type: DELETE
Endpoint: /wp-json/integration-cds/v1/webhooks/{webhookId}
Retrieving Webhooks
Request Type: GET
Endpoint: /wp-json/integration-cds/v1/webhooks
Retrieving Available Forms
Gravity Form List
Request Type: GET
Endpoint: /wp-json/integration-cds/v1/gravity_forms
Elementor Form List
Request Type: GET
Endpoint: /wp-json/integration-cds/v1/elementor_forms
Premium Form List
Request Type: GET
Endpoint: /wp-json/integration-cds/v1/form_registrations