User Binding
This is a premium feature. For more details see Premium Edition.
The plugin previously known as Dataverse Integration has been renamed to DataPress.
This change reflects our commitment to enhancing user experience and aligning with our product vision.
All references to Dataverse Integration in the documentation and UI will be updated to DataPress.
Link WordPress users to Dataverse contact records to enable personalized experiences, secure sign‑in authorization, and optional user data synchronization.
Introduction
What is User Binding?
- A mechanism to associate a WordPress user with a Dataverse contact record.
- When a bound user signs in, DataPress loads the associated contact data for use in Twig, FetchXML, views, and forms.
Why bind users?
- Personalize content and limit visibility using current user data.
- Parameterize FetchXML queries and [views](/dat-fill or lock form fields with default values.)
- Implement custom table binding.
Practical examples
- Show only “My Opportunities”: filter a view by the current user’s contact.
- Auto-fill a support form with the signed-in contact’s name and email.
- Hide premium content unless the user’s contact has a “Login Enabled” flag set.
Understand user binding modes
DataPress can bind a user to a Dataverse record using several binding modes.
Quick comparison
| Mode | How it works | When to use | Setup path (high level) |
|---|---|---|---|
| Lookup | Admin selects the exact Dataverse contact for the WP user | Small/managed portals; precise control; onboarding specific users | Users → Configure binding → Pick contact |
| Username | Auto-binds using matching value in alexacrm_wordpress_username column | Larger portals; migrate existing users; reduce admin work | Populate column on contacts; enable Username mode |
| Custom | Developer logic via integration-cds/user-binding/bind-custom filter | Complex enterprises; multi-tenant; external IDP / SSO mapping | Implement filter; return an EntityReference |
| — | Not bound (default) | Anonymous access; admins; when binding is not required | Do nothing |
Notes
- “Lookup mode” was previously known as Manual.
- “Username mode” was previously known as Default or Auto.
- Disabled mode is deprecated and no longer available in new deployments.
Mode details
Lookup mode
- What happens: You pick a contact in WP Admin; the user binds to that specific contact.
- Why use it: Precise, auditable control; ideal for curated memberships or partner portals.
- Requirements: Admin access; the target contact must exist.
- Good to know: Easy to review and change per-user.
Username mode
- What happens: DataPress finds a contact whose
alexacrm_wordpress_usernamematches the WP username. - Why use it: Reduces manual work when onboarding many users.
- Requirements: The AlexaCRM solution adds
alexacrm_wordpress_usernameto contact; ensure values are populated. - Good to know: Works well with migrations and automated provisioning.
Custom mode
- What happens: Your code returns an
EntityReferencefor the current WP user. - Why use it: Complex identity strategies, multi-environment logic, or lookups by external identity keys.
- Requirements: Implement the
integration-cds/user-binding/bind-customfilter. - Good to know: Gives full control to developers.
Configure global binding settings
Go to Bindings → User Binding in the plugin admin.
Sign-in authorization for bound users
- Toggle Authorize users against Dataverse during sign‑in to add a Dataverse check to WP authentication.
- The system validates whether login is enabled for the bound contact.
- Plays well with existing WP auth; Dataverse acts as an additional gate for bound users.
Tips
- If a user is not bound, Dataverse checks do not apply.
- If you change binding modes globally, existing per-user binding may still apply per the configured mode.
Use user binding UI to bind users to Dataverse
In WordPress Admin → Users:
- Hover the target user and click Configure binding.
- Choose the binding mode (Lookup / Username / Custom).
- For Lookup, search and select the contact in the dialog.
- Save.
If you manage bindings primarily in Dataverse (Power Apps), see Methods below.
Enable field synchronization for bound users
You can map WordPress user / usermeta fields to Dataverse columns:
- Email —
user_email - First Name —
first_name - Last Name —
last_name - Display Name —
display_name
How to use
- Open the mapping UI and set column names for the fields you want synchronized.
- Leave any mapping blank to skip syncing that field.
Developers
Need to manage bindings programmatically?
See: How to bind a user using WP API.
Important to remember
Always keep at least one WordPress administrator account without binding.
This ensures you can still access and administer the site even if bound users cannot sign in or their bindings become invalid.
How to bind a user in WordPress Power App (maker portal)
You can create bindings directly from Dataverse using one of two methods:
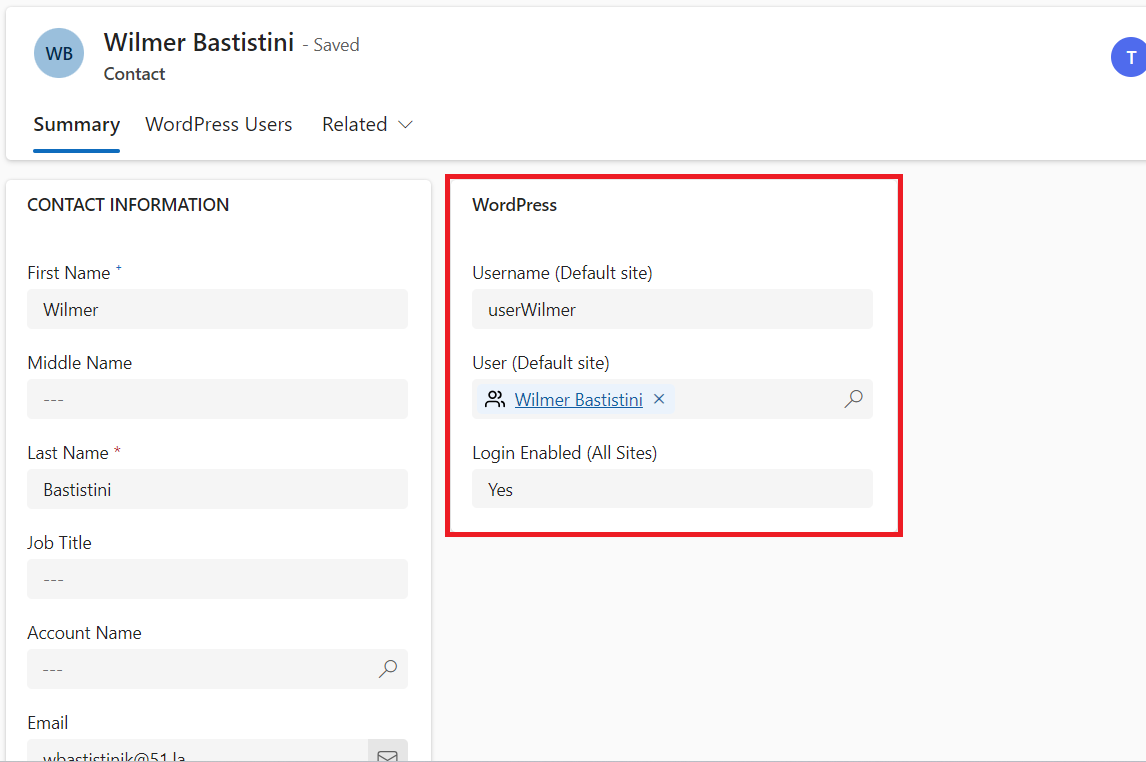
Method 1 — Bind Contact → WordPress User
- Open the Contact (or WordPress User, see method 2 accordingly).
- Focus on the WordPress section of the contact form.
- In User (default site), type and select the WordPress user.
- Verify the Username (default site) value.
- Ensure Login Enabled is set to Yes.
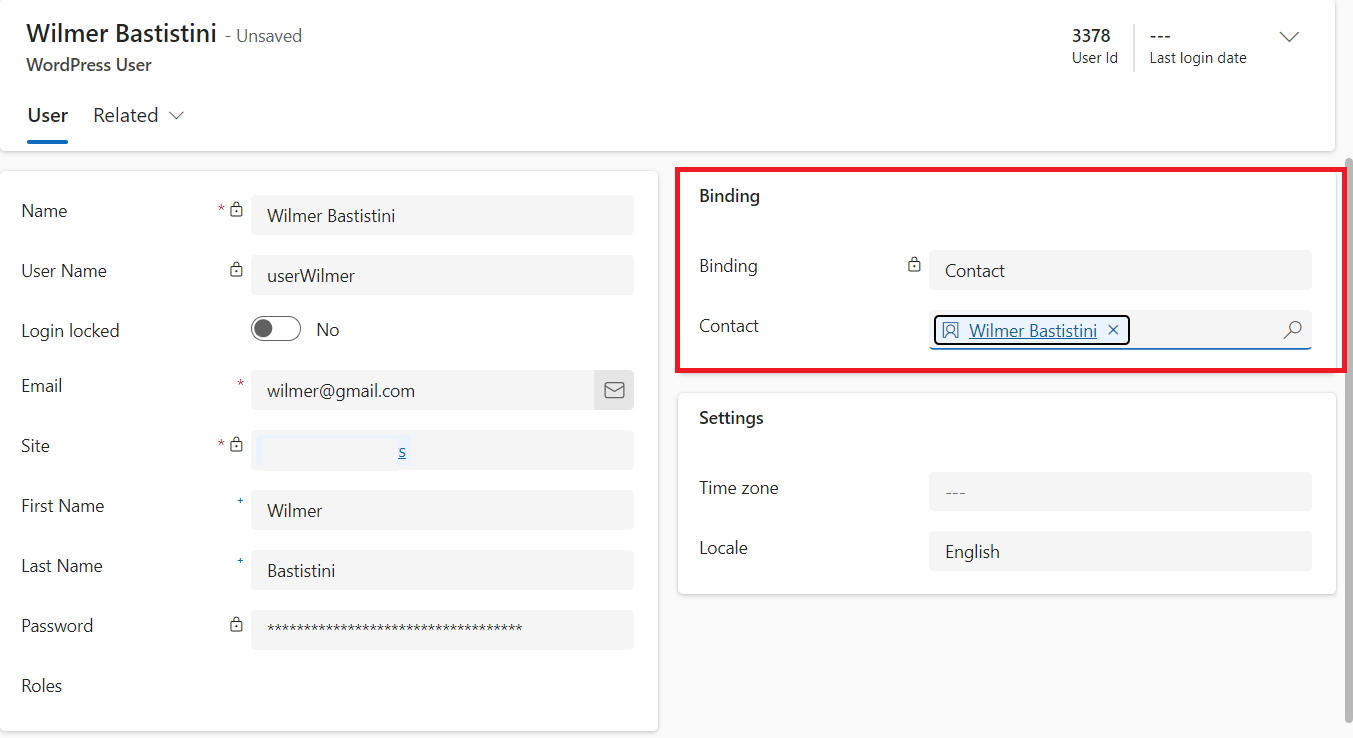
Method 2 — Bind WordPress User → Contact
- Open the WordPress user.
- Focus on the Binding section.
- In Contact, search by first/last name and select the contact.
- The binding will be populated automatically.
When to use which?
- Method 1: You mainly work from Dataverse/Power Apps and manage contacts first.
- Method 2: You mainly work from WordPress and manage users first.
Use binding information in Twig
The user object provides binding context on the page.
Example 1 — Greet bound user and show contact ID
{% if user.reference %}
  Hello, {{ user.record.fullname }}!
  <small>Contact ID: {{ user.reference.Id }}</small>
{% else %}
  Hello, Guest!
{% endif %}
Example 2 — Filter a FetchXML list by the current contact
{% fetchxml collection="mycases" %}
<fetch mapping="logical">
  <entity name="incident">
    <attribute name="title" />
    <filter>
      <condition attribute="customerid" operator="eq" value="{{ user.reference.Id }}" />
    </filter>
  </entity>
</fetch>
{% endfetchxml %}

{% for c in mycases.results.entities %}
  <li>{{ c["title"] }}</li>
{% endfor %}
You can also parameterize views and forms using the current user’s contact data (e.g., default values, conditional visibility).